Getting Started
If you are new to Cityscape Pro, You have came to the right place to start. This simple guide will walk you through every feature of the plugin.
For video tutorials, please visit TUTORIALS page.
If you are new to Cityscape Pro, You have came to the right place to start. This simple guide will walk you through every feature of the plugin.
For video tutorials, please visit TUTORIALS page.
Setting up Cityscape Pro for 3ds Max comprises of two steps: installing and licensing through your OS.
The Cityscape Pro installer for 3ds Max is simple and easy to follow and can be downloaded from https://www.simpolium.com website. Before installing Cityscape Pro, please make sure your computer meets the System Requirements for running 3ds Max with Cityscape Pro.
During the installation, you will have to enter your name, name of the company, and serial number that was provided to you after purchase. There are two types of licenses for Cityscape Pro – Workstation and Render node. You must have an internet connection to activate a license. Workstation license can be activated only once. If you want to transfer a license to a different workstation, please contact the support to deactivate the license and transfer it to another workstation. Render node licenses are unlimited and free, as long as you have at least one valid workstation license.
Trial versions are fully licensed for a period of 30 days and are designed solely for Evaluation purposes. A trial is not to be used for profit, production, or commercial use.
After the installation:
The main installation directory at C:/Program Files/Simpolium/Cityscape is defined as <cityscapedir>
List of items inside of <cityscapedir>/Library:
Location of the Cityscape Pro plugin: <maxdir>\plugins\cityscapePro.gup
Components:
workstation or render – mandatory component depending on the installation type, you should also choose additional components depending on available 3ds Max versions on your system:
Examples:
Cityscape Pro supports native geometry tools on all render engines.
Direct Link: https://www.simpolium.com/documentation/?tab=requirements
The Main toolbar is used to generate result and access material library. The interactive generate button turns blue and flashes when changes are detected.
Note: After the installation, Cityscape Pro helper will appear in Create panel > Helpers > Simpolium > Cityscape Pro.
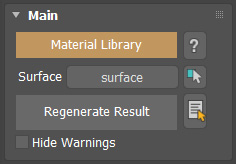
To start, click the <Pick Surface> button and pick the surface geometry in the scene.
Note: For best results, the base surface should be a clean, uniform geometry without double faces, holes, flipped polygons or long triangles. Quad polygons are recommended. For optimal calculation times, the surface area and polycount should be low. (See the Knowledge Base section)
Direct Link: https://www.simpolium.com/documentation/?tab=main-toolbar
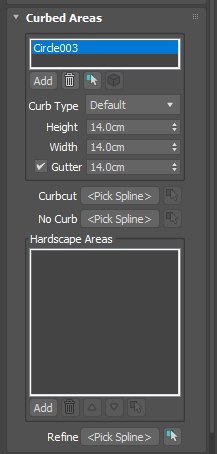
Curbed areas are elevated areas (0.01m to 0.2m) from a road surface which is surrounded by curbs. The remaining exposed part of the surface object that is not covered with curbed areas, acts as a road model.
Notes:
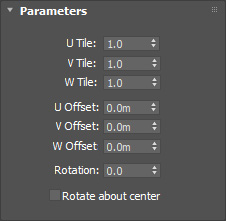
Cityscape mapping modifier is used on hardscape area and curbed area splines to modify tiling, offset and rotation of map channel 1.
Notes:

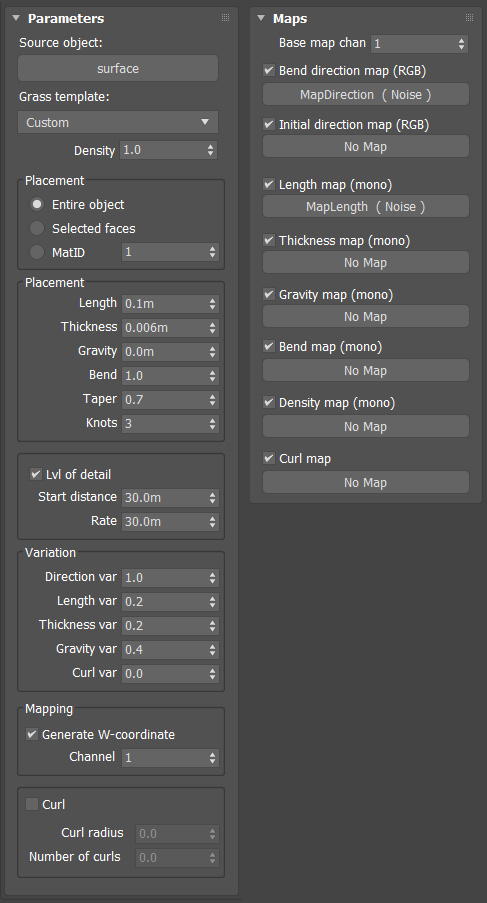
The toolbar allows user to automatically create Supergrass object on selected hardscape area with few clicks.
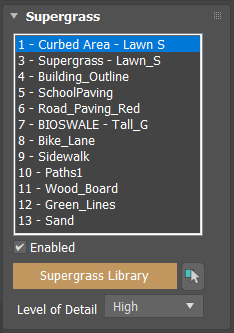

Supergrass is a procedural grass plugin for vray. The grass is generated only during render time and is not actually present in the scene.
To create a Supergrass object, you must first select a mesh with real-world mapping from the 3ds Max scene, then go to the Create panel, choose the VRay category, and then click on the Supergrass button. Note that if you have not selected an object, or you have selected an object which is not compatible with Supergrass, the Supergrass button will appear greyed out.

The surface object is used as a base for all calculations. The geometry should be single-sided, with normals facing upwards. The topology should be simple, clean, and uniform, a plane object would be an ideal, but complex terrain objects can be used as a surface as long the topology is clean and low poly. The surface should NOT contain double faces, flipped polygons, zero area triangles, or holes. It is recommended to use the Terrain tool under the Modify surface tab to add holes and other terrain assets.
The Input splines for Cityscape Pro should be simple, with a minimum required interpolation. Vertex count should be as low as possible to speed up calculations and avoid problems. It is highly recommended to clean up splines that are directly imported from CAD software. In some cases, it might make more sense to completely rebuild splines before using them in Cityscape Pro. The splines should NOT be self-intersecting, when self-intersection is detected, an error message will pop up with highlighted spline. All splines should be Closed, with an exception of Road Texture spline mask templates. When open spline is detected, an error message with highlighted vertices will pop up.
Geometry defects on the generated mesh is a rare occasion, but there is a dedicated tool to fix that: Curbed Areas toolbar > Refine. Procedure: Draw a small rectangle that covers the problematic area, pick it as a refine spline, and generate. The Refine tool will subdivide the specified area and calculation resolution will increase to generate a correct mesh. The second option would be slightly shifting the problematic hardscape area spline vertices around in random directions. simplifying/reducing the vertex count of the problematic splines could also help.
On rare occasions, a problematic spline area can cause freezing during generation and/or wrong calculation results. There are a couple of ways of fixing that issue:
The Road Texture tool In Cityscape Pro can generate a very complex composite map. For optimal viewport performance, it is highly recommended to set the viewport rendering level to “basic” mode in 3ds max per-viewport performance window > Per View Presets > Rendering Level.
It is recommended to place Cityscape assets close to 3ds max scene center to avoid problems caused by calculation accuracy. When the problem is detected, a warning message will appear.
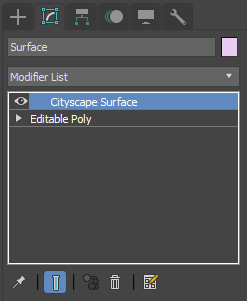
The result that gets generated by Cityscape Pro gets updated on each generation. It is not recommended to apply modifiers on top of Curbed Area geometry, otherwise, all custom edits on generated Curbed Area geometry will be lost on next generation. The same principle applies to a Surface object, when a Modify Surface checkbox is enabled, a Cityscape Surface modifier gets applied to the original surface object, which stores a new, modified mesh generated by Cityscape Pro. DO NOT collapse Cityscape Surface modifier, Do not place any modifiers on top of Cityscape Surface modifier. If you’d like to make any edits to the original surface object, edit the original object UNDER the Cityscape Surface modifier and regenerate Cityscape Pro.
Cityscape Pro has multiple dependant stages of generation to reduce the calculation time and only regenerate elements that need updates. If the changes are made to a lower level, like the Surface object, a full generation will be triggered, if the change is minor, a partial generation might occur, which can save calculation time. Cityscape Pro keeps multiple levels of buffered geometry to avoid full recalculation on minor changes.
Cityscape Pro is designed to generate large, detailed city-scale site models. It is very important to name all input splines properly to make a workflow intuitive. When the name of the Cityscape Pro helper is changed, a new name is displayed in a viewport. If you have multiple Cityscape Pro helpers in a scene, it can be useful to name them accordingly, for example: “Main Site”, “Context Site”, “Pavement Texture 01” and etc.
It is recommended to use inches in 3ds max System Units Scale – Costumize>>Units Setup>>System Unit Setup>>System Unit Scale: 1 Unit = 1 Inches.
Direct Link: https://www.simpolium.com/documentation/?tab=knowledge-base
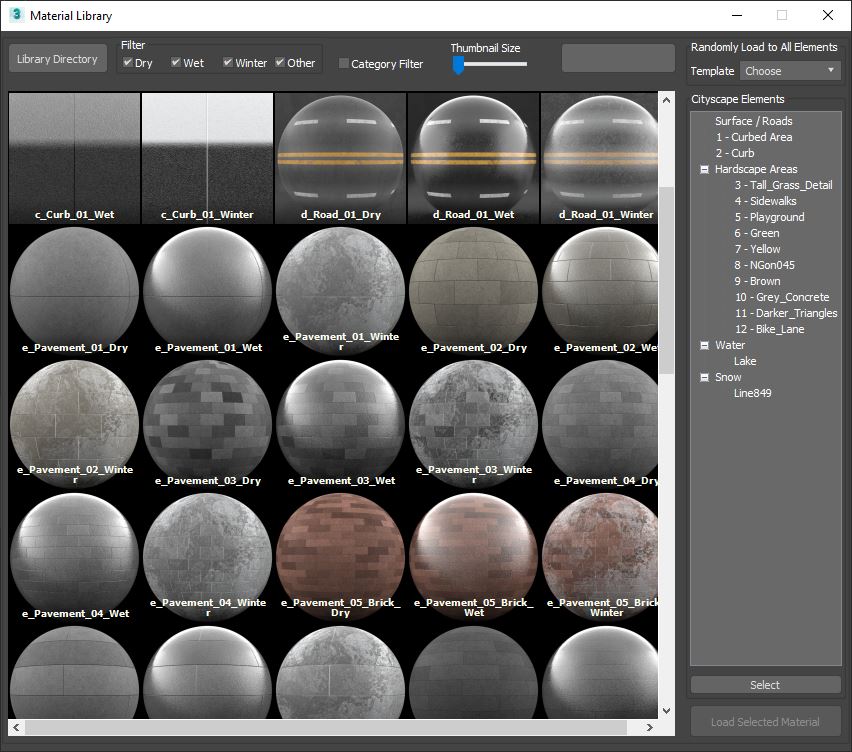
The material library contains over 70 high quality tileable materials that can be used within Cityscape Pro environment as well outside of it. The materials are designed for real world mapping.
Note: To access material library, first create Cityscape Pro Helper from Create panel > Helpers > Simpolium > Cityscape Pro, then Click on orange Material Library button in the Main toolbar.

Direct Link: https://www.simpolium.com/documentation/?tab=material-library
The toolbar is used to edit existing surface, add water areas – Lakes, ponds and reservoir as well as terrain areas – Berms, holes (in a surface) and terrain depression. When the checkbox is enabled, a Cityscape Surface modifier gets applied to the original surface object. The modifier stores a newly generated surface model, but also lets you edit the original surface object under the Cityscape Surface modifier.
Notes:
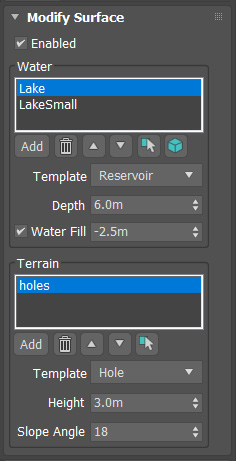

Note: All input splines must be closed and should NOT be self-intersecting. It is recommended to name input splines to make the workflow more intuitive. (See the Knowledge Base section)
Direct Link: https://www.simpolium.com/documentation/?tab=modify-surface
Cityscape Surface modifier gets applied to the original surface object. The modifier stores a new, generated surface model, but also lets you edit the original surface object under the Cityscape Surface modifier.

Direct Link: https://www.simpolium.com/documentation/?tab=cityscape-surface
Cityscape Spline modifier can be applied to a problematic spline area that is used in Cityscape Pro. The modifier can force Cityscape Pro to perform an alternative calculation process for the spline area which can solve problems related to freezing during calculations or improperly generated mesh.
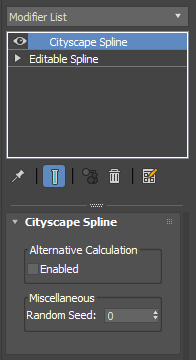

Direct Link: https://www.simpolium.com/documentation/?tab=cityscape-spline
The road texture tool is used to create a procedural pavement texture or a complete road material for surface object (The remaining exposed part of the surface object that is not covered with curbed areas acts as a road model). The road texture tool uses 3ds max composite map and automatically configures it with spline masks.
Notes:
When Road Texture is enabled, Surface object and Curbed area will automatically receive a new mapping information in uvw channel 2.


Direct Link: https://www.simpolium.com/documentation/?tab=road-texture
Snow Geometry tool allows user to easily create snow piles and compacted snow geometry for winter scenes.
Notes:
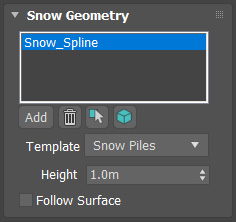

Direct Link: https://www.simpolium.com/documentation/?tab=snow-geometry
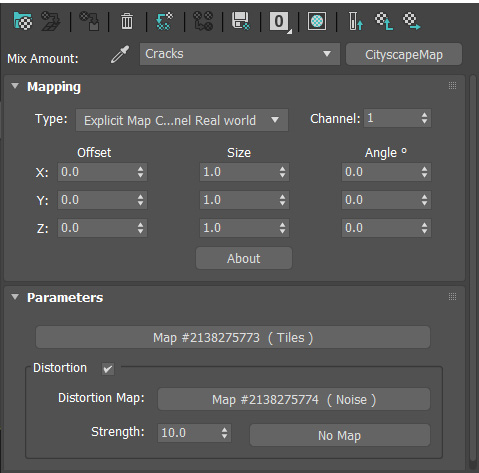
Cityscape Map can be used in multiple case scenarios, It can control mapping coordinates on multiple levels (for example to fully rotate a complex composite map with only one parameter). Cityscape map also has a distort feature which allows user to distort one bitmap with another one, to create complex noise maps and avoid tiling effect. (Very useful for terrain textures and dirt maps)


Cityscape Splines Presets can be used for road markings in Road Texture tool. Arrows, Cyclist, Preferential and Handicapped shapes are located in Create panel, Shapes tab, under Cityscape category. All Cityscape shapes are closed, it is recommended to scatter them around a scene as per site plan, attach all of them together to a single spline and use it in the Road texture tool with “Fill Closed Spline” template.
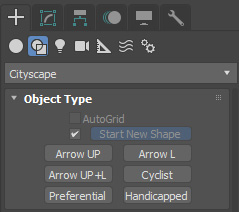

Direct Link: https://www.simpolium.com/documentation/?tab=spline-presets
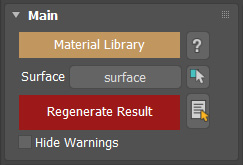
Cityscape Pro comes with diagnostic tools to help user troubleshoot a scene. When a potential problem is detected, the generate button turns red and a warning message appears.

Direct Link: https://www.simpolium.com/documentation/?tab=warning-messages
Starting from v1.5.0, Cityscape Pro comes with a utility that allows users to collapse Cityscape objects and maps to render the scene on machines that don’t have the plugin installed.
The “Collapse Cityscape objects” command is located under Main Menu>>Cityscape Pro dropdown menu. It is recommended to back up the scene before collapsing to maintain a parametric workflow.
Fixes:
Fixes:
Fixes:
Fixes: